Monday 1 November 2010

Have you been wondering.....

.....where I've been?  No?  Oh, ok....

Well anyway, I've not been able to do much photo work (again) for various reasons, all of which I should have ignored, but none of which I did ignore.  We've been debating changing the cars and had decided that we'd wait for a few weeks. Then we decided that we really *had* to change my husband's car but mine would have to wait a few weeks.  Then we went and changed *both* cars.

And my injured knee is still very much injured and painful and worrying me as it's stopping me doing the training that I should be doing already for next year's London Marathon.

And we've had half term when I found out that the kids' homework was NOT as up to date as they'd have me believe, and as a result they have been hogging my laptop.

And yesterday I felt really poorly and spent the whole day on the couch.

All in all I have sometimes struggled to get my 365 photo done (many of them have been poorly thought out as I've forgotten them til the last minute).  Not the way I wanted this year's photo work to go.

But I have decided to save up for the 5D Mk3 when it comes out !

And now it's November and assignment 2 should have been in to the tutor in September.  Ooops.....

Tuesday 12 October 2010

A week on....

...and no further forward.

I had hoped to get to the beach today where I planned to take photos of some nice yellow sand, and then whatever colourful things I could find along the way.  This would have helped me build up a nice library of colour photos I could use in the future.  But the weather was very grey and cloudy when I got up, and it's only just lifted really, and my son needed something doing in town.  So I am hoping to get out that way tomorrow if the weather is a bit better.

I also have my eye on a new lens, a 70-200 L IS USM jobbie.  I have been saving for a new camera body, but this one seems to be ok now after its little hiccup the other week, and I think that I really ought to put the money towards a good lens.  So while I was in town today I checked my balance and I'm really really close to having enough money :-)  I just want to make absolutely sure that this is the lens I want (I'm fairly certain it is, having read all the reviews) before I commit my money.

Monday 4 October 2010

Project 31 - Analysing a Colour

For this project I have to find and record individual colours.  This will be an on-going project and I will keep adding to this post continually. 

Green

This first photo was taken in Rotorua, New Zealand where the light quality is superb and colours are much more vivid.  There appears to be thousands of variations of a single colour.  I said when we lived there that there were more shades of green that I'd ever thought possible.


By comparison this is a photo of the grass in my back garden in England.  Still some variation in colour, but not much !

Blue

Again taken in New Zealand at Hataitai, Wellington.  The blue sky and water in the harbour gives the image a relaxed feel.

Purple
This is detail from a Michaelmas daisy.  It shows a lighter shade of purple, more lilac with definite blue tones.
Yellow


This is a yellow chrysanthemem which shows various shades of yellow, caused both by light and shadow, and also the colouring of the petals.

Hooray

Well the photo uploader seems to be working better than it did last week, so I'll press on.

Dentist first tho.....

Project 30 - Colour Control (manually operated cameras)

For this project I had to find an object of a strong definite colour and photograph it with the cameras automated exposure setting. Then I had to take the same photo over and under exposing it.

I initially wanted to photograph a bright red dress I have, but the folds of the material meant that there were always shadows and variations in colour on the photos. So instead I chose to photograph a blue chair back.


This is the image taken on my camera's auto exposure setting. 1/125 sec f6.3


This was taken at 1/125 sec f5.6.


1/125 sec f5


1/125 sec f7.1

1/125 sec f8

By over-exposing the blue becomes lighter, and by under-exposing it becomes darker and stronger.

I have 2 black Labradors and I have found I have a problem getting their true colour in a picture if I use the camera's auto-exposure.
 
This was taken using the camera's auto-exposure setting.  It was 1/15 sec at f7.1.  The dog was lying on a dark brown couch under a window and the whole image has been lightened by the camera's auto setting.

This one was taken on fully manual at 1/15 sec f9.  By under-exposing the image slightly, the dog's fur is a truer black, but is still lightened by the sunlight from the window, and it isn't so dark that detail is lost.

I think that this project is so very useful, and has reminded me to use the manual settings on the camera more than my usual Av mode.

Thursday 30 September 2010

Blogger photo uploader...

... is giving me a headache. And I've been on the help pages which have shown that loads of people are having problems with the new updated photo uploader (it's taking up to 20 mins to upload one photo) I've changed my settings to use the old uploader, but it's gone back to the old, old uploader which was difficult to use and I've had enough !

So I shall try again tomorrow

Uh - oh

I've just received my "Congratulations, you are in next year's London Marathon" magazine !  I actually knew that I had a place, as I'd deferred my place from this year's race, but I'm still excited :-)

Training, training and more training now I guess.......

Wednesday 22 September 2010

Plan B

I have decided that I am going to leap to the next section, "Colour", in order that I can get my next assignment off to the tutor nearly on time.  I have made a note of the projects I need to return to once the assignment is sent off, and in fairness, I have already shot some of the images and I have ideas written down for many of the others.  I just feel, as well, that I am going a bit "stale" by keep coming back to the same section and if I can start something new it should hold my interest a bit more.

So I'm putting the kettle on and curling up on the couch to read all about Colour :-)

Monday 20 September 2010

Ok.....

.....that's a bit better.  I have had a look ahead and I have to shoot for real and implied triangles (need a few props and some co-operation from one of my sons), circles (will take some thought for the implied circles), and then rhythms and patterns and finally applying the elements of design for which I have some idea what I am doing (i think).

And then I can give my full concentration to Colour (that's the one I'm looking forward to) in order to try and get Assignment 2 off to my tutor.

I had a look at one of my first blog posts which listed my aims for this course.  The first aim was to enjoy it and the last aim was to push myself.  Hmmmmmmmmm

Project 25 - Rectangles

For this project I had to produce three images that contained rectangles. 
This is of my back doors which are quite obviously rectangular glass within rectangular frames.  I particularly like the repetition of the rectangles in the bricks below the doors.

This is from a pile of breeze blocks from a building site near me.  I like that the stacking means that the rectangles are both horizontal and vertical.
                                       
This is the end of a stack of wooden planks in our garden.  I like the circles enclosed within the rectangular shape of the cut wood.

I liked this project and am enjoying looking at shapes within my images. 

Project 24 - Shapes

For this project I had to produce two images of objects with simple outlines,that stress the shape.
Initially I decided to photograph an egg against a plain background.  The egg is smooth and the oval shape is clearly defined.  I like the idea, but the lighting is uneven and I wasn't able to correct this with a reflector.
                                      
So I took a photo of one of my son's footballs which shows the round shape perfectly well.  The oval shape I was trying to capture with the egg is a sub-division of the circle.
                                        
This is a simple picture of my son's hobby shed.  The simple outline is clearly a rectangle, as is the roof from this plane, just angled.

Project 22 - Curves

For this project I had to produce 4 images which show curves.

 This is an image of the field next to us.  The farmer has just cut the hay and it is lying on the field.  This is the corner of the field and the hay shows the curve of the bend that the cutter took.  The sweep of the curve leads the eye across the photo.


This is my son doing son messing around.  As he leans backwards into his walkover, his body is making a curve.  There is a real sense of movement in this image, and I have left enough space at the side for him to continue his action.
This is detail from two spider webs in my garden.  Because of the low sunlight it was proving difficult to get a good shot of a complete web, so I decided to concentrate on the part of the web that was in good light, and managed to find these two webs next to each other.  These curves are made up from straight lines, but the overall effect is of a curve.  Again the eye is led around the web by the curve.

This is a Michaelmas daisy in my garden.  I have cropped the image to accentuate the curve made by the shape of the flower.  I like that the curve is made by the petals which in turn are curved at their tips.  I also like the depth of this image created by the shallow depth of field and the plain dark background.

Note for self

return to.....


project 18 - relationship between points
project 19 - multiple points
project 23 - implied lines
project 26 - real and implied triangles (real triangle already shot)
project 27 - real and implied circles
project 28 - rhythms and patterns
project 29 - applying the elements of design (detailed notes of ideas in folder)

Problems.....

Things are all going a bit pear shaped at the mo, and I am beginning to have a little panic about this course which was NOT the idea when I began it.  But this morning I found myself waking up early and having a little stressy moment about it.  The final straw was last weekend when I took my camera out specifically to get a picture of all the bales in a large field near us.  Beautiful day, lovely fluffy clouds in the sky, and my camera died after one shot.  I couldn't set the aperture at all.  I changed the shooting mode,  turned it off, took out the battery and even swore, but all my attempts failed.  I got it home and fiddled some more with it, and now I am the proud owner of a camera with an intermittent and unpredictable fault.  I am also the proud owner of a car with an intermittent and unpredictable fault. 

Not the end of the world, I know.  But it's annoying and a bit unsettling when I'm planning to shoot something or somewhere and I'm not sure if it'll work.  So I'm saving up my pennies for a new camera, but I don't think I'll have the money til next year.  Patience is not one of my strong points.......

Monday 6 September 2010

Oh my .......

.... I daren't even look and see when my last post was !

However, we have had a lovely summer holiday-time, with a week at Center Parcs and a week at my parents' house.  I also took the charity fund-raiser photos at the stables where my son rides.  The idea is that I take photos at the rehearsal and dress rehearsal of their panto and get them printed up, and then they are sold at £1 each at the charity day at the end of the summer. 

And now I have the builders in again - replacing the fascias on the house - which means that it's difficult to get out to take photos, or even to get organised enough to work on them.  But my second assignment has to be in this month, so I'll have to get down to it.

But first, a cup of coffee I think.....

Friday 13 August 2010

Project 21 - Diagonals

For this project I had to take 4 photos which use diagonals "strongly".  As you will see, I produced more than 4 photos !

This is of a honeysuckle flower.  The main part of the flower is quite vertical, but the open flower leads off on a diagonal to the top right of the frame.  I particularly like this one as the eye is directed strongly off to that corner.
                               
This is a photo of a 'plane at a local airshow taken in June this year.  The pilot had put his smoke on and the movement is implied from the bottom right to the top left.  The smoke leads the eye to the 'plane and the 'plane directs the eye beyond.  There is enough space in front of the 'plane in this image for the 'plane to move into, and that makes for a pleasing composition.
                                              
This is a photo of the RAF Falcons Parachute Display Team taken at a show near here in July this year.  The team is forming a lovely diagonal across the frame and the movement is from top to bottom.
                                       
This is my older son at the top of the CN Tower in Toronto Canada, taken in June 2008.  The window frame is making a diagonal in the photo and is mirrored by my son's posture.  Your eye is led upwards along the length of the diagonals.

                                
This is the staircase at my house and the banisters and foot rails are making opposing diagonals across the frame.  This is quite a "busy" image and the eye moves constantly around the frame.
                                   
This is a photo showing the window detail of a building in Montreal, Canada.  It is similar to the example in the coursework of the balconies, showing the "powerful and diagonal effect by compression and repetition" by shooting using a telephoto lens at an angle to the building (as I was at ground level).  I have included it in this project because of its similarity to the one in the coursework.

I enjoyed this project, I find the use of diagonal lines in photography can give a stronger photo with more impact.  They can imply movement and cause the viewer's eye to move around the frame easily as they give direction.

Project 20 - Horizontal and Vertical Lines

For this project I had to produce 8 photos showing examples of horizontal and vertical lines.

Firstly my vertical lines

Trees growing tall and straight.  I also like that the trees are reflected in the lake and the trees in the background are out of focus.  As the trees are shown only in part, the vertical aspect is emphasised.

Support pole on a building site.  There are horizontal lines around it, but the upright pole is clearly the main subject in this image.

The vertical pattern in a fence panel, together with the vertical fence post.

Vertical soldiers on a flight of stairs. 

The trees give the natural vertical lines - the others are man-made.

My horizontal lines

The horizon which is probably the most obvious horizontal line in nature to photograph.

Breeze block wall - the blocks form a horizontal line across the frame.  Your eye is drawn from side to side.

Wooden joists.  The joists are photogrpahed in horizontal lines and the shadows add more horizontal lines to the image.
Stairs giving horizontal lines to this image.

When shooting this project I became incresingly aware of the lines around us.  I found it easier to find vertical lines to shoot; tall buildings, people, bus stops, trees etc.  I particularly like the lines created by the contrast in light as shown in the phot of the wooden joists above.  I also like the direction and movement implied by lines, for example in the photo of trees above, your eye moves along the height of the trees.  I was also intrigued how a line of verticals can equal a horizontal line as in the photo above of the stair soldiers.  Your eye moves up and down the soldiers but also horizontally along the line.

I intend to return to this project at a later date when I have a bigger collection of photos, as I enjoyed looking at the way the different orientation of lines within an image works.

Project 17 - Positioning a Point

In this project we are reminded that there are essentially 3 classes of position : in the middle; slightly off-centre; close to the edge.  I had to take 3 photos with a single point which was placed in a different part of the frame in each of the photos. 

In this photo the white flower is positioned centrally in the frame.  The image is static, with no sense of movement being suggested. 

In this second image the white flower has been placed slightly off-centre to the right of the frame, but still close to the horizontal centre line.  It is a slightly more interesting image as the eye is drawn to the area of grass on the left of the image and then back to the flower. 
                                      
In this final image the white flower is placed close to the right side of the frame and below the horizontal centre line.  In my opinion it is the best composed of the images.  Your attention is drawn to the position of the flower in relation to the frame.  By drawing a line mentally through the flower (point) vertically and horizontally we can see that the point is placed roughly in accordance with the rule of thirds.

Tuesday 10 August 2010

Planning the next few projects

I have emailed my tutor and now have to concentrate on getting the second assignment to her in September.  This meant that I was able to relax and enjoy a week at Center Parcs last week.  While there I did take a few photos which I think I may be able to use for some of the upcoming projects.

I also have sorted out some photos I took recently on a building site, specifically with Project 20 - horizontal and vertical lines, in mind.

I am planning to shoot more tomorrow, and then I can complete some projects and get them on here.

As expected, the summer holidays and ferrying around the kids is taking priority over everything !  I also need to buy the school uniforms this week, as the next three weeks are already full !

Hey-ho !

Wednesday 28 July 2010

Project 16 - Defining a Point

In this project I have been asked to list as many types of situation I can which would make a clear photo of a point, thinking about the types of background, types of subject, lighting etc.

For a subject to be considered a point in a photograph it must be small in the frame and contrast with its surroundings.

  • small object against a plain background
  • dark coloured subject against a light background
  • light coloured object against a dark background
  • object with a strong focal point within it ( I am thinking about the flower close up in the coursework folder for project 16, page 102, where the centre of the flower contrasts with the dark petals around it )
Specifically :
  • poppy in a wheat field
  • horse in a field of green grass
  • car on a road
  • aeroplane in  the sky
  • dog on a beach
  • kite in the sky
Colour can be an important factor in determining a good photograph of a clear point, but we shall be covering colour later in the course. 

I looked through my photo collection and also photos I have saved from magazines, for ones which I felt were good examples of the use of a point.  I have attached a couple of my favourites.

When searching for one of an aeroplane in the sky, I found it difficult to find one with the 'plane small enough in the frame.  This shot is of a Mustang and was taken at a local air display earlier this year.  Althoough there is a large cloud popping up in the frame, the darker and distinct shape of the 'plane is strong enough to be a good point in the image.
                                     
This image is of a poppy in a field of unripe barley.  Here it is the colour of the bright red poppy which contrasts against the green-yellow of the barley creating the point.  The background is actually quite fussy, but the colour contrast emphasises the flower, and the eye is drawn to it.

Tuesday 27 July 2010

Preparation

I spent the weekend (well, Sunday mainly) preparing for the next part of the course, which is Elements of Design.  It covers points, lines, shapes and (a bit later) colour. I'm quite looking forward to this part actually. I've been planning what photos I already have which I can use, and what photos I need to take (there's a lot!).  I'm getting a bit confused with the difference between "rhythm" and "pattern" so I'll have to look into that in more detail, perhaps a nosey around some blogs may help point me in the right direction.  If not, I'll have to post on the OCA forum...

I must also email my tutor and let her know that the next Assignment will be late (surprise) - the kids are on school holiday now, and while they are old enough to make their own entertainment, I find I am being called on for my taxi and cooking skills !

Wednesday 21 July 2010

Assignment 1 - amendments

My first assignment came back some weeks ago with suggested amendments from my tutor.  So I shall post the amendments here together with the comments she made which led to the amendments, if that makes sense?

Black
My tutor commented that using a black subject against a black background presents technical problems, eg lighting, which I should have addressed in my notes.  She also wondered if the foreground blur in the image is too dominant.
When I shoot I tend always to use natural light whenever possible.  I like the softness of natural light as opposed to harsh studio or on-board flash light.  When I took this particular image, i did find that the sunlight was quite harsh, it being around mid-day.  I was shooting in the sun room, so i found that if i closed the blinds (which are a light oat colour) the light was diffused enough for the black of the coal to be quite true.  I also adjusted the lightness levels in photoshop slightly, just to darken the black a bit more. 
Having looked again at this image I can see what my tutor means about the coal in the foreground being too dominant.  I often shoot with shallow depth of field, but I agree that the coal in front is too large in the frame to be blurred in this way. 
                                        
I looked through my shots and came across this one, where the foreground coal is in focus and the smaller lump at the back is blurred. 

White
My tutor commented that this was a straightforward and simple composition.  She suggested that I expand my notes.


I bought a pot of snowdrops at my local garden centre mainly with this image in mind.  The pot had been left outside for a few days and the water droplets on the petals are actually melted snow !  I positioned the snowdrop, still in its pot, by the front door which has frosted glass and so diffused the light nicely.  Again I used natural light as flash lights would have been too harsh, and there was enough natural light to get the image I wanted.  The white background is the back of a sheet of mounting card (I have several in various colours which I use for my flower work).  I trie several shots, focussing on different parts of the plant, but this one was the best.  I was a bit concerned that there was too much "green" in the image for it to represent "white", but I think I was wrong to worry.

Sour
My tutor said that she was disappointed that I had not included one of the images of my son tasting a sour lemon.  She felt the submitted image suggested "translucent" ratehr than "sour".  She thought I should have gone for a more expressive image.  This ties in with her final comments which suggest that I should try something "quirkier" now and again, and go with my instincts, even if it means following a more unusual route.
                                       

My son has a very expressive face and is quite co-operative luckily !  We sat in the garden so that we could use what sunlight there was.  I gave him a slice of lemon and shot away while he tasted it.  I chose this image as his face is showing a good and natural expression ( there is always the risk that a child will play up to the camera and over-act ) and the lemon slice is clearly visible, so the viewer is left in no doubt what is happening.
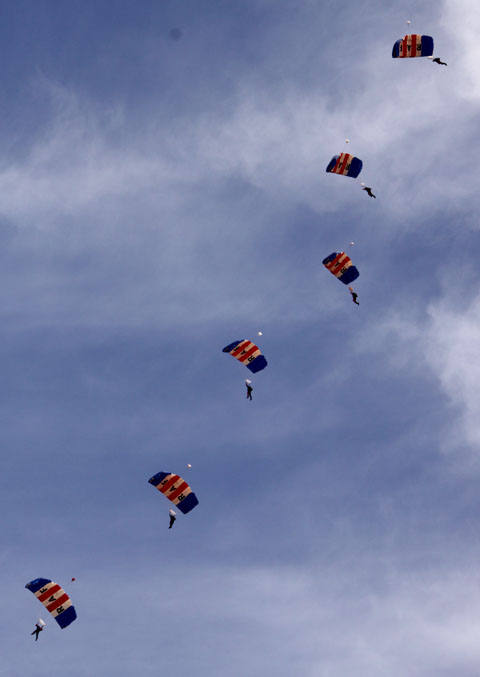
Many
My tutor asked to see some variations of the image - she guessed, quite correctly, that I had taken heaps !  She also asked whether I had explored suggesting movement.


The first additional image shows a vertical composition along the same theme.  There is some rape, but the majority of the image is taken over with red poppies.  The second image shows selective focus, and movement is suggested by the position of the poppies bending to the right and with their petals drawn very much to the right.  I like the image, but am not sure it conveys the idea of "many".  The third image shows the use of sunlight to back-light a subject, adding extra detail to the petals.  The image also has flare spots, which I don't normally like, but in this image I think they are acceptable.
Overall I think I still like the image I submitted originally the best, but it was nice to look at the rest of the images again.

Light
My tutor said that I had captured the soft floating movement of the light seed heads.  But she suggested trying a square crop to take in 3/4 of the dandelion head and everything to the right of it.
                                  
I do like this crop, and wouldn't have thought of doing it without my tutor's suggestion.  Again this was taken using natural sunlight on a fairly dull day, outside and using  black mounting card as a background.

Straight
My tutor suggested that the image would be more effective if cropped from the top to just above the tree line.
                               
This crop does emphasise the straight road, which I saw when out one day.  I made a mental note to return with my camera to get this shot for this assignment.  The crop ensures that the road acts as a perfect leading line from the front to the back of the image.

Curved
It was suggested that I should return to the idea of a direct pairing with the image for "straight" and use my "bend in the road" sign. 
I cropped the image down as much as I could to lose the distracting background, but I'm still not happy with it as an image.  The background is too messy still.  Although I can see the advantage of a "pair" with the image for "straight" I still think that the image of the bananas is better.

High
The suggestion for improvement here is that I include more written detail.
                                               
This is taken from the base of the CN Tower in Toronto, Canada.  I took it in July 2006 during a six week tour of the country.  It was completed in April 1975 and, at 1815 feet high, it remained the tallest freestanding structure in the world for 31 years.  Even now, it is still the tallest freestanding structure in the Western Hemisphere. 
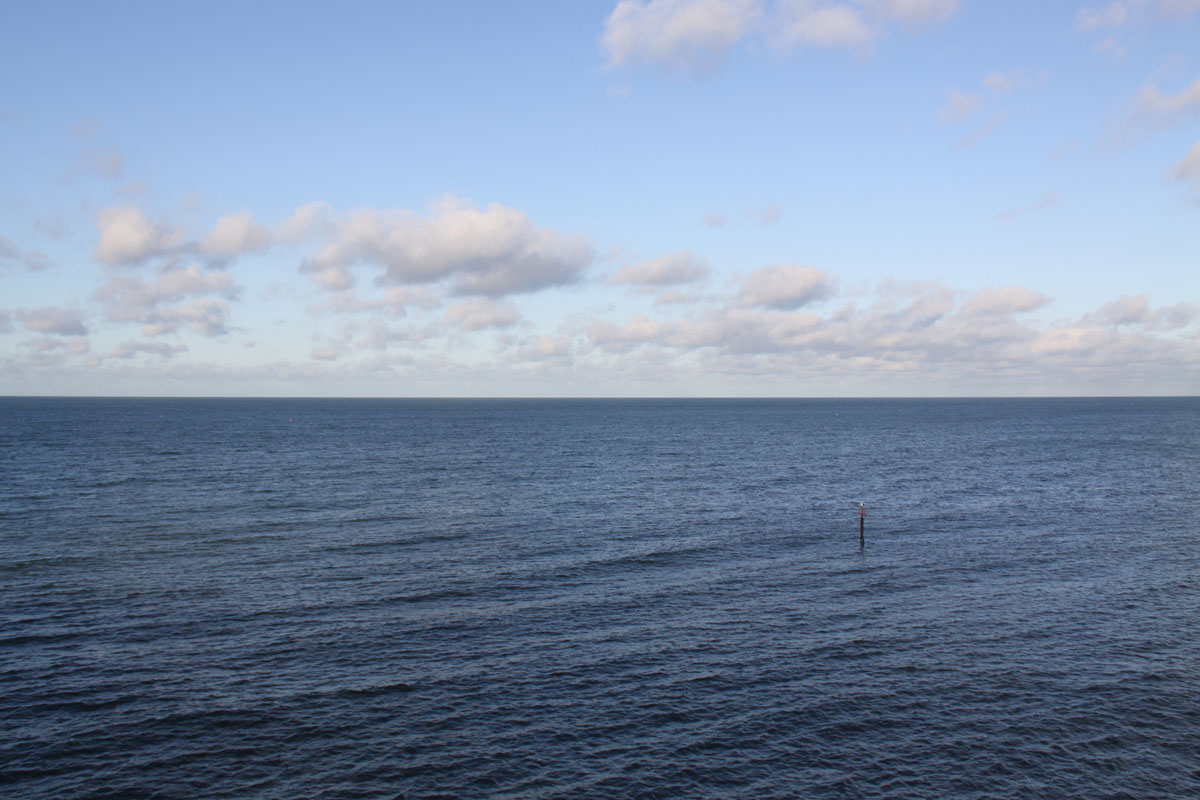
Low
My tutor pointed out that there is a lot of distracting information in this image, and the subject matter is not clear.  She suggested making alterations by cropping or using phootoshop, or reshooting the idea, which is what I chose to do.
                                 
I liked the idea of shooting low to the ground, and thought that my garden would be a good place to do this.  In this image a solitary buttercup is surrounded by a ring of clover flower heads.  I like the simple composition and the suggestion that the image is taken from a low perspective is emphasised by the out of focus grass and clover in the foreground.  I focussed selectively on the buttercup to ensure that it stood out as a subject.

Black and White in One Image
My tutor commented that a zebra is an ideal subject for this brief.  But again I have to expand my notes.
                                     
This abstract of a zebra markings is my chosen image to demonstrate the two contrasts of black and white together in one image.  The image is straight out of the camera - I was shooting with this assignment in mind.  The image was taken at a local zoo earlier this year.  It is a Grevy's Zebra, also known as an Imperial Zebra.  In the wild these live in Kenya and Somalia.  The stripes on a Grevy's Zebra are thinner and closer together than on other species of zebra, and the pattern of stripes is unique to each individual zebra, just as a fingerprint is unique to each human.  The Grevy's Zebra is an endangered species.

My tutor also made suggestions about my blog as a Learning Log, and things that I should be including within it. This, along with her comments to make more comprehensive notes and outline any technical issues or editing, I hope will improve my photography.